The difference between a good ground beef quesadilla and a great one comes down to one ingredient most people skip: tomato paste. Not tomato sauce, not salsa, just a spoonful of paste cooked right into the meat.
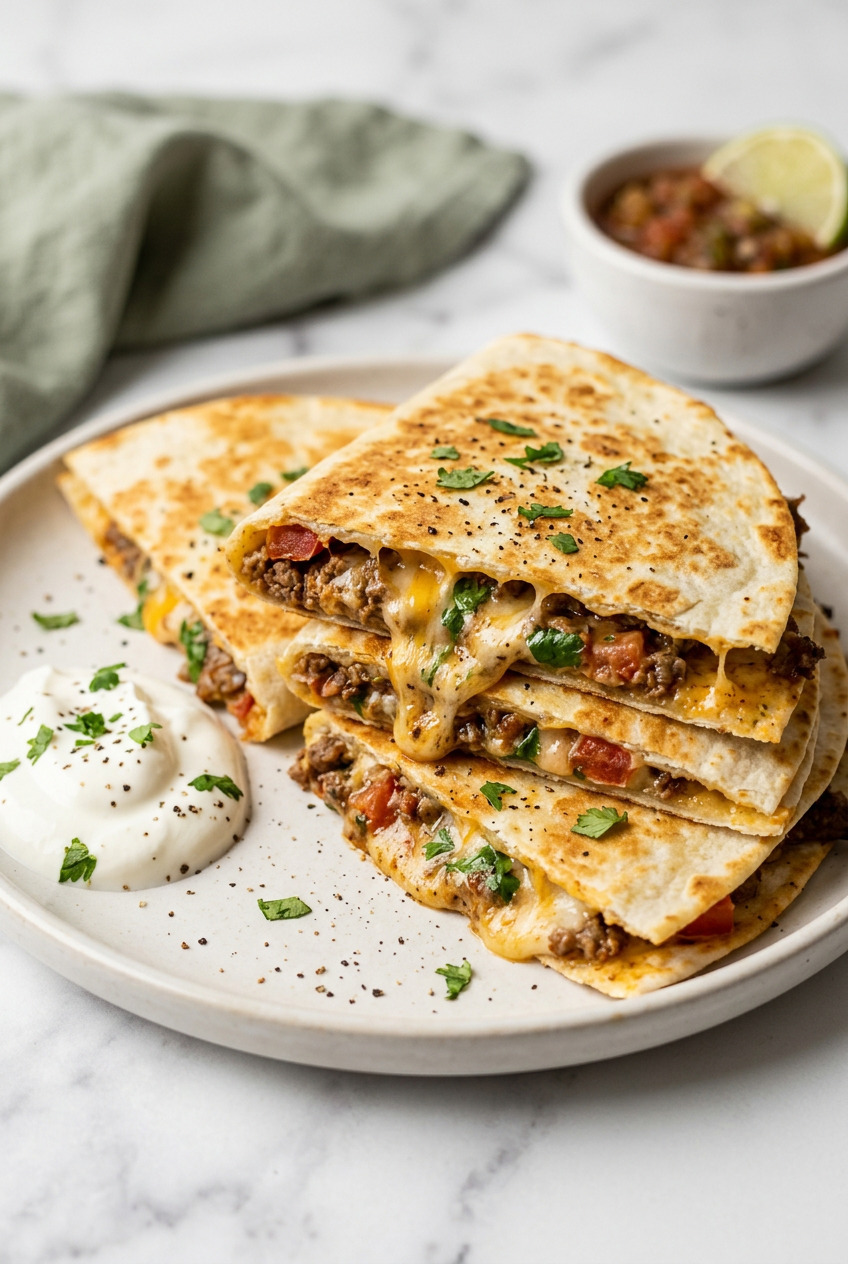
It concentrates all that beefy, savory flavor and keeps the filling from being watery, which means your tortilla actually gets crispy instead of soggy. Add a two-cheese blend that melts into every corner, and you’ve got a quesadilla worth making on repeat.
Twenty minutes is all you need. I’ll walk you through my exact method for getting that perfect golden crunch on both sides.
Why You Will Love This Recipe
- Table-ready in 30 minutes. From raw ground beef to golden quesadillas on a plate. Perfect for those chaotic weeknights when you need dinner fast.
- One skillet for the filling. Brown the beef, season it, and the filling is done. Then use that same skillet (or a clean one) to crisp the quesadillas. Minimal cleanup.
- Endlessly customizable. Add black beans, corn, bell peppers, or keep it simple with just beef and cheese. You make the rules.
- Kid-approved and crowd-friendly. My kids request these by name. They’re also the first thing to disappear at any game day spread.
- Meal prep friendly. The beef filling keeps beautifully in the fridge, so you can assemble fresh quesadillas all week long.
What Are Quesadillas?
The word quesadilla comes from the Spanish word queso, meaning cheese. At its simplest, a quesadilla is a tortilla filled with cheese and cooked until melted and golden. That’s it.
In Mexico, quesadillas vary wildly by region. In Mexico City, they’re often made with corn tortillas and might not even contain cheese (a famously heated debate). In northern Mexico and across Tex-Mex cooking, flour tortillas stuffed with cheese and fillings like seasoned beef are the standard.
Adding ground beef turns a simple cheese quesadilla into a full meal. I like to think of it as the perfect crossover between a taco and a grilled cheese sandwich.
Ingredients for Ground Beef Quesadillas
You probably have most of these in your kitchen right now. That’s part of what makes this recipe so great.
For the Beef Filling
- Ground beef (1 lb). I use 80/20 for the best flavor. The fat renders out during cooking and you’ll drain the excess. If you prefer leaner, 90/10 works too, but the filling won’t be quite as juicy.
- White onion (1/2 medium, finely diced). White onion has a clean, sharp bite that mellows beautifully when sautéed. Yellow onion works in a pinch.
- Garlic (2 cloves, minced). FRESH garlic, please. Jarred garlic doesn’t come close. The aroma alone is worth the 30 seconds of mincing.
- Taco seasoning (1 tablespoon). Store-bought is perfectly fine here. If you want more depth, add 1/2 teaspoon garlic powder on top of it.
- Tomato paste (1 tablespoon). This is my secret weapon. It adds a concentrated, savory richness to the beef that taco seasoning alone can’t achieve. Just one tablespoon does all the work.
- Salt and freshly cracked black pepper. Season as you go. Taste the filling before you start assembling.
For Assembly
- Flour tortillas (8 large, 8-inch). Flour tortillas crisp up beautifully and stay pliable enough to fold and flip without cracking. Corn tortillas tend to dry out and break, so save those for tacos.
- Shredded cheese (2 cups total). I use 1 cup sharp cheddar and 1 cup Monterey Jack. The cheddar brings bold flavor. The Jack brings that stretchy, gooey melt. Together, they’re perfection. Swap the Jack for Pepper Jack if you want a kick of heat.
- Unsalted butter (1 tablespoon). For cooking the quesadillas. Butter gives you better browning and flavor than oil. You only need a small amount per quesadilla.
Optional Add-Ins
- Black beans (1/2 cup, drained and rinsed). Stir them into the beef filling for extra protein and texture.
- Frozen corn (1/2 cup, thawed). Adds a pop of sweetness and color.
- Bell pepper (1/2, finely diced). Green or red, sautéed with the onion for a fajita-style spin.
- Refried beans (1/3 cup). Here’s a trick I love: spread a thin layer of refried beans directly on the tortilla before adding cheese. It acts as a moisture barrier and adds a creamy, velvety layer.
For Serving
- Guacamole
- Sour cream
- Pico de gallo or salsa
- Lime wedges
A Note on Cheese
I know pre-shredded cheese is convenient. I get it. But if you can, shred your own from a block. Pre-shredded cheese is coated with potato starch to prevent clumping, and that starch interferes with how it melts. Block cheese melts into smooth, creamy pools. Bagged cheese melts into something grainy.
If you really want to go all out, try Chihuahua cheese (also called queso menonita). It’s a Mexican melting cheese that pulls like mozzarella but tastes richer. Mix it with cheddar and you’ll have the best cheese pull of your life.
How to Make Ground Beef Quesadillas
Start to finish, you’re looking at about 30 minutes. The filling comes together in 10-12 minutes, and each quesadilla takes about 4 minutes to cook.
Step 1: Brown and Season the Beef
Heat a large skillet over medium-high heat. Add the ground beef and break it apart with a wooden spoon as it cooks, about 5-6 minutes until no pink remains.
Drain any excess fat from the skillet. This step matters. Too much grease in the filling means soggy quesadillas later.
Add the taco seasoning, garlic powder, and tomato paste. Stir everything together and cook for another 1-2 minutes until the tomato paste darkens slightly and coats the beef. The smell at this point is unreal.
Step 2: Cook the Onion and Garlic
Push the beef to one side of the skillet and add the diced onion to the empty space. Let it cook for 3-4 minutes until softened and slightly golden.
Add the minced garlic and stir everything together. Cook for just 30 seconds. Garlic burns fast, so keep it moving.
If you’re adding optional bell pepper or corn, toss them in with the onion. Season with salt and pepper to taste. Transfer the filling to a bowl and set aside.
Step 3: Assemble the Quesadillas
Here’s where technique matters. Lay a flour tortilla flat. Sprinkle a layer of cheese across the entire surface. Spoon about 1/4 cup of the beef filling over one half. Top the filling with a bit more cheese. Place a second tortilla on top and press down gently.
The cheese on both sides is key. It melts into the tortilla and creates a seal that holds everything together. Cheese first, filling second. Always.
If you prefer the fold-in-half method, that works too. Just load one half of a single tortilla, fold it over, and press. You’ll get smaller portions that are easier to flip.
Step 4: Cook Until Golden and Crispy
Wipe out the skillet (or grab a clean one) and set it over medium heat. Add about 1 teaspoon of butter and let it melt.
Carefully slide one assembled quesadilla into the skillet. Press down gently with a spatula. Cook for 2-3 minutes until the bottom is deep golden brown and the cheese has started to melt.
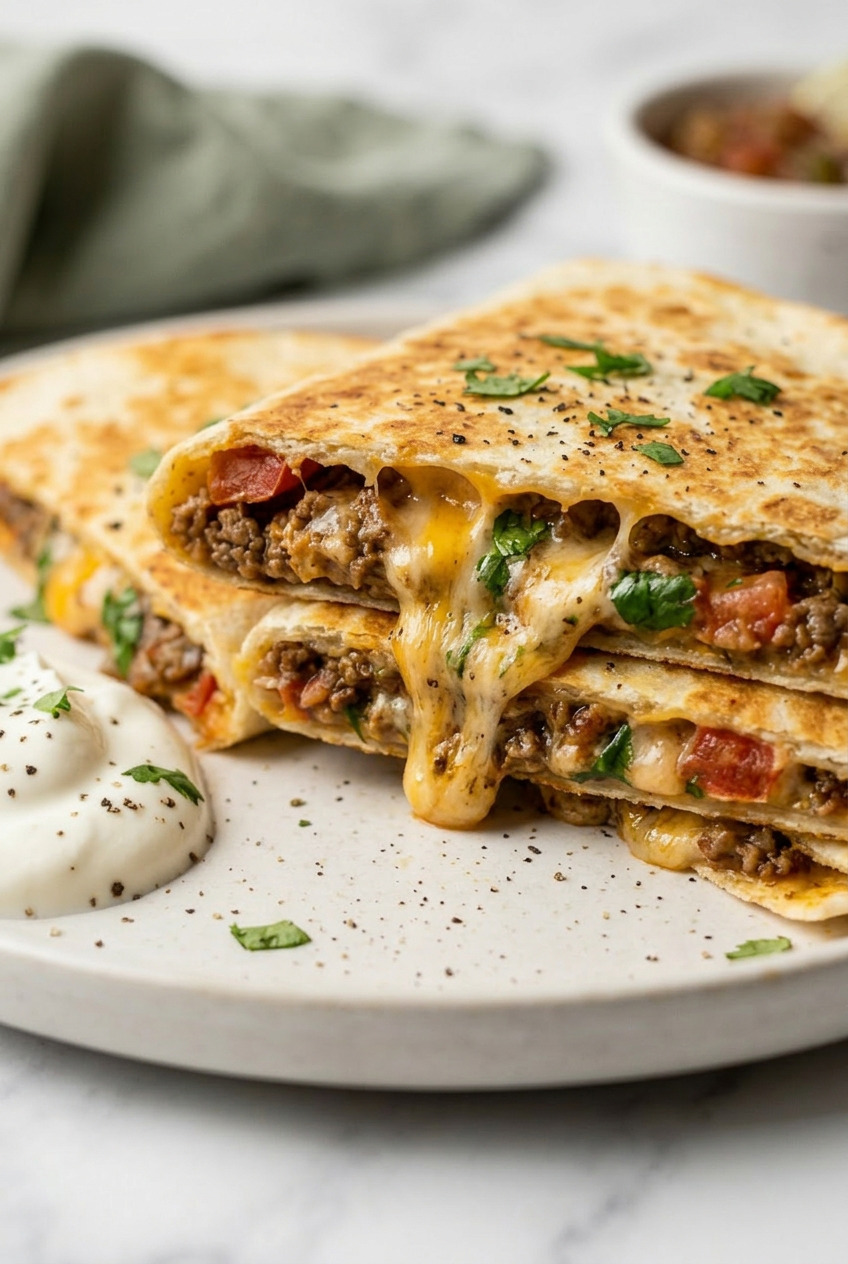
Flip carefully and cook the other side for another 2-3 minutes. You want both sides golden and crispy, with cheese fully melted inside.
Transfer to a cutting board and let it rest for 1-2 minutes before cutting. I know it’s tempting to slice right away, but resting lets the cheese set just enough that the filling doesn’t slide out everywhere. Repeat with remaining quesadillas, adding a touch more butter to the skillet each time.
Tips for the Best Ground Beef Quesadillas
- Don’t overfill. About 1/4 cup of filling per quesadilla is the sweet spot. Overstuffed quesadillas won’t seal properly, and filling spills out everywhere when you flip.
- Shred your own cheese. I said it before and I’ll say it again. Block cheese melts better. Period.
- Medium heat, not high. High heat burns the tortilla before the cheese melts. Medium heat gives you a crispy, evenly golden exterior and fully melted cheese inside. Low heat makes them soggy. Medium is the sweet spot.
- Press with a spatula while cooking. Gentle, steady pressure helps the cheese make full contact with the tortilla. That’s how you get those gorgeous golden spots.
- Rest before cutting. Just 1-2 minutes on a cutting board. The cheese firms up slightly and acts like glue, keeping everything inside when you cut.
- Use the same skillet. Cook the filling first, then use that same skillet for the quesadillas. The little bits of seasoned beef left behind toast into the tortilla and add extra flavor. Seriously, it’s that easy!
- Try the refried bean spread. A thin layer of refried beans on the inside of the tortilla adds creamy richness and acts as a moisture barrier that keeps the tortilla from getting soggy. Fret not, my dears, it’s not weird. It’s wonderful.
Variations and Serving Ideas
- Baked sheet pan quesadillas. Want to make a big batch for a crowd? Layer tortillas, filling, and cheese on a sheet pan, top with another layer of tortillas, and bake at 400°F for 20-25 minutes. Cut into squares and serve. Hands-off and feeds a crowd.
- Spicy version. Add diced jalapeño to the beef filling, or stir in a spoonful of chipotle in adobo. Swap Monterey Jack for Pepper Jack cheese. Your taste buds will tingle.
- Ground beef and peppers. Slice bell peppers and onion into thin fajita-style strips, sauté until charred and tender, and add them to the filling. A whole different vibe.
- Healthier spin. Use 90/10 lean beef, whole wheat tortillas, and dial back the cheese to 1.5 cups total. Still delicious. Still a crowd pleaser.
- Breakfast quesadilla. Leftover beef filling plus scrambled eggs plus cheese. I make these on weekend mornings and my family goes crazy for them.
- Swap the protein. Ground turkey, ground chicken, or even plant-based ground meat all work here. The seasoning does most of the heavy lifting flavor-wise.
What to Serve with Ground Beef Quesadillas
Quesadillas are a full meal on their own, but a few sides turn them into a proper spread.
- Guacamole. Creamy, cool, and rich against the hot crispy tortilla.
- Pico de gallo or salsa. Fresh and full of flavor. The acidity cuts through the richness of the cheese and beef beautifully.
- Sour cream. A cool, tangy contrast.
- Lime wedges. A squeeze of fresh lime right before you eat adds brightness that balances the whole plate.
- Mexican rice. Makes it feel like a restaurant meal.
- Simple green salad. Something light and crunchy alongside all that gooey, melty goodness.
Make-Ahead and Storage Tips
How to Store
- Refrigerator. Let quesadillas cool completely, then store in an airtight container with parchment paper between each one. They’ll keep for up to 3 days.
- Freezer. Freeze cooked quesadillas in a single layer on a baking sheet until solid, then transfer to a freezer bag. Good for up to 2 months.
- Beef filling only. The seasoned beef filling stores even better on its own. Refrigerate for up to 4 days or freeze for up to 3 months. Make a double batch on Sunday and you’ve got quesadilla filling ready all week. Toss it into tacos, rice bowls, or nachos too.
How to Reheat
- Skillet (best method). Heat over medium heat for 2 minutes per side. Gets the outside crispy again.
- Oven or toaster oven. Place on a baking sheet at 350°F for 8-10 minutes. Great for reheating multiple at once.
- Microwave (quick but soft). Wrap in a damp paper towel and heat for 30-45 seconds. The tortilla will be soft, not crispy, but it works when you’re in a rush.
Ground Beef Quesadillas
Ingredients
For the Beef Filling
- 1 lb ground beef 80/20 or 90/10
- 1/2 medium white onion finely diced
- 2 cloves garlic minced
- 1 tablespoon taco seasoning
- 1/2 teaspoon garlic powder
- 1 tablespoon tomato paste
- salt and freshly cracked black pepper to taste
For Assembly
- 8 flour tortillas 8-inch
- 1 cup sharp cheddar cheese shredded
- 1 cup Monterey Jack cheese shredded (or Pepper Jack for heat)
- 1 tablespoon unsalted butter for cooking
Optional Add-Ins
- 1/2 cup canned black beans drained and rinsed
- 1/2 cup frozen corn thawed
- 1/2 bell pepper finely diced
- 1/3 cup refried beans spread on tortilla as a base layer
For Serving
- guacamole
- sour cream
- pico de gallo or salsa
- lime wedges
Instructions
Make the Beef Filling
- Heat a large skillet over medium-high heat. Add the ground beef and break it apart with a wooden spoon, cooking for 5-6 minutes until no pink remains. Drain any excess fat.
- Add the taco seasoning, garlic powder, and tomato paste to the beef. Stir to combine and cook for 1-2 minutes until the tomato paste darkens slightly and coats the beef evenly.
- Push the beef to one side of the skillet. Add the diced onion and cook for 3-4 minutes until softened. Add the minced garlic and stir everything together. Cook for 30 seconds.
- Season with salt and pepper to taste. If using optional add-ins (black beans, corn, bell pepper), stir them in now. Transfer the filling to a bowl and set aside.
Assemble the Quesadillas
- Combine the shredded cheddar and Monterey Jack in a bowl. Lay a flour tortilla flat and sprinkle cheese evenly across the surface. Spoon about 1/4 cup of beef filling over one half. Top with a bit more cheese and place a second tortilla on top. Press down gently.
- Repeat with remaining tortillas, cheese, and filling to make 4 quesadillas.
Cook Until Golden and Crispy
- Wipe out the skillet and set over medium heat. Add about 1 teaspoon of butter and let it melt. Carefully slide one quesadilla into the skillet and press down gently with a spatula. Cook for 2-3 minutes until the bottom is deep golden brown.
- Flip carefully and cook the other side for another 2-3 minutes until golden and the cheese is fully melted.
- Transfer to a cutting board and let rest for 1-2 minutes before cutting into halves or wedges. Repeat with remaining quesadillas, adding a touch more butter each time.
- Serve hot with guacamole, sour cream, pico de gallo, and lime wedges.
Notes
- Don't overfill: About 1/4 cup of filling per quesadilla keeps them easy to flip and properly sealed.
- Shred your own cheese: Block cheese melts smoother than pre-shredded, which is coated in starch.
- Medium heat is key: High heat burns the tortilla before the cheese melts. Low heat makes them soggy.
- Rest before cutting: 1-2 minutes lets the cheese set so the filling stays inside.
- Refried bean trick: Spread a thin layer on the tortilla before adding cheese for extra creaminess and a moisture barrier.
- Make-ahead filling: The beef filling keeps in the fridge for up to 4 days or freezer for up to 3 months.
Frequently Asked Questions
What’s the best seasoning for ground beef quesadillas?
Taco seasoning is the easiest and most reliable base. I use 1 tablespoon of taco seasoning plus 1/2 teaspoon garlic powder and 1 tablespoon tomato paste for extra depth. If you want to skip the packet, combine 1 teaspoon each of chili powder, cumin, smoked paprika, and garlic powder with a pinch of oregano. Season with salt and pepper to taste.
What cheese works best in a beef quesadilla?
A blend of sharp cheddar and Monterey Jack gives you the best of both worlds: bold flavor and a smooth, stretchy melt. For heat, swap the Jack for Pepper Jack. For the most authentic Mexican option, try Chihuahua cheese or Oaxaca cheese, both of which melt like a dream. Avoid pre-shredded if you can. Block cheese always melts better.
Should I use one tortilla folded or two tortillas sandwiched?
Both work. I prefer the two-tortilla sandwich method because you get more filling in each one and it’s easier to cut into wedges. The single tortilla fold is great for smaller portions and faster cooking. If you’re feeding a crowd, the two-tortilla method gives you bigger, more satisfying pieces.
Can I add black beans or other fillings?
You will love black beans in these. Drain and rinse canned black beans, then stir them into the cooked beef filling. Corn, diced bell peppers, and even a spoonful of salsa mixed into the filling are all great additions. Just be careful not to overfill, or the quesadilla won’t seal properly.
How do I get the outside crispy, not soggy?
Three things: medium heat (not high, not low), drain your beef well after browning, and don’t overfill. Excess moisture from the filling is the number one cause of soggy quesadillas. Butter in the skillet helps with browning. And always let them rest before cutting so steam can escape instead of getting trapped inside.
How long do leftover quesadillas last?
Stored in an airtight container in the fridge, they’ll last up to 3 days. Stack them with parchment paper between each one so they don’t stick together. Reheat in a skillet for the best texture.
Can I freeze ground beef quesadillas?
Yes! Freeze them in a single layer on a baking sheet first, then transfer to a freezer bag once solid. They’ll keep for up to 2 months. Reheat directly from frozen in a skillet over medium-low heat for 3-4 minutes per side, or in the oven at 375°F for 12-15 minutes.
Can I make the beef filling ahead of time?
This is one of my favorite meal prep moves. Make a double batch of the seasoned beef filling on Sunday and store it in the fridge for up to 4 days. When dinner rolls around, just assemble and cook fresh quesadillas in minutes. The filling also freezes well for up to 3 months. Use it in quesadillas, tacos, burrito bowls, or nachos throughout the week.
Leave a Review